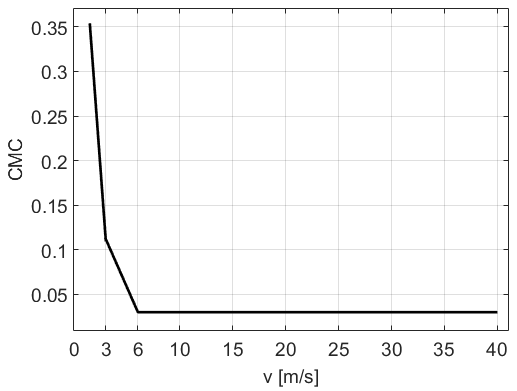
Determination of the constant K1:
| Measurement range | Measurement uncertainty CMC* |
|---|---|
| (1,5 ÷ 3) m/s | –0,161 s/m · v + 0,594 v m/s |
| (3 ÷ 6) m/s | –0,027 s/m · v + 0,193 v m/s |
| (6 ÷ 40) m/s | 0,03 |

Determination of the constant K2:
| Measurement range | Measurement uncertainty CMC* |
|---|---|
| (1,5 ÷ 3) m/s | –0,113 s/m · v + 0,42 v m/s |
| (3 ÷ 6) m/s | –0,02 s/m · v + 0,141 v m/s |
| (6 ÷ 40) m/s | 0,02 |

Determination of the constant B:
| Measurement range | Measurement uncertainty CMC* |
|---|---|
| (1,5 ÷ 3) m/s | –0,23 s/m · v + 0,854 v m/s |
| (3 ÷ 6) m/s | –0,041 s/m · v + 0,287 v m/s |
| (6 ÷ 40) m/s | 0,04 |

* The Calibration and Measurement Capability (CMC) presented within the scope of accreditation, representing the expanded uncertainty at a confidence level of approximately 95%, is defined as the smallest measurement uncertainty that a laboratory can achieve during the routine calibration of objects. It is established based on uncertainty budget analyses conducted during calibrations using the most accurate measuring instruments available for calibration. CMC represents the smallest value of expanded uncertainty related to the calibration result (the obtained difference between the measured quantity value and the value indicated by the calibrated instrument) that can be provided on the calibration certificate. For different calibration conditions and different instruments, the expanded uncertainty stated on the certificate may be larger.